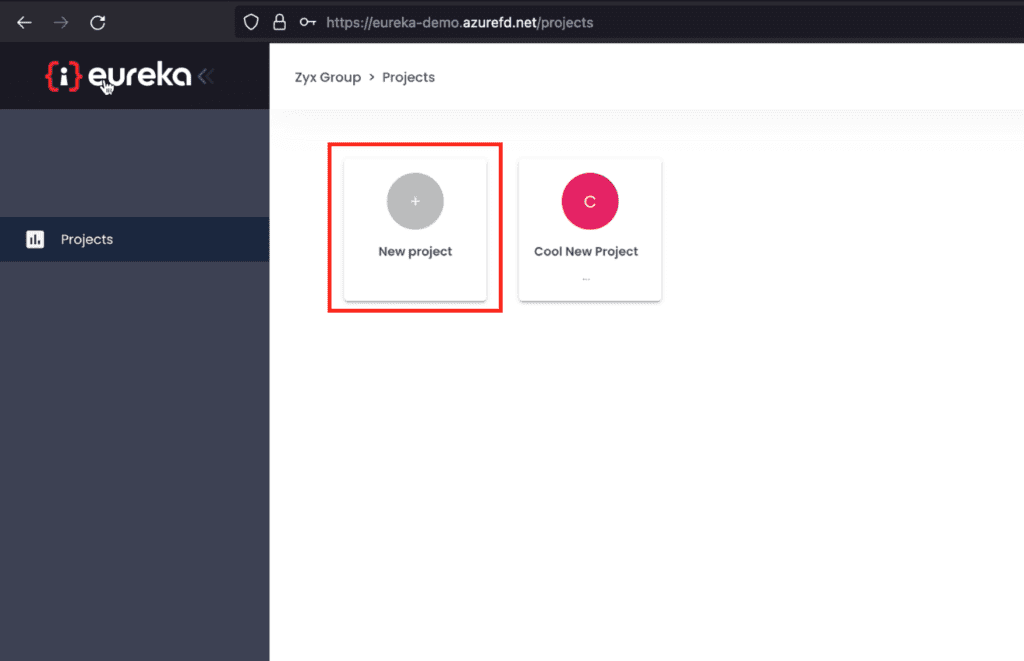
1. If you wish to create another project click the Eureka Icon/ Home button
2. Click the Create New Project and fill in the details as needed
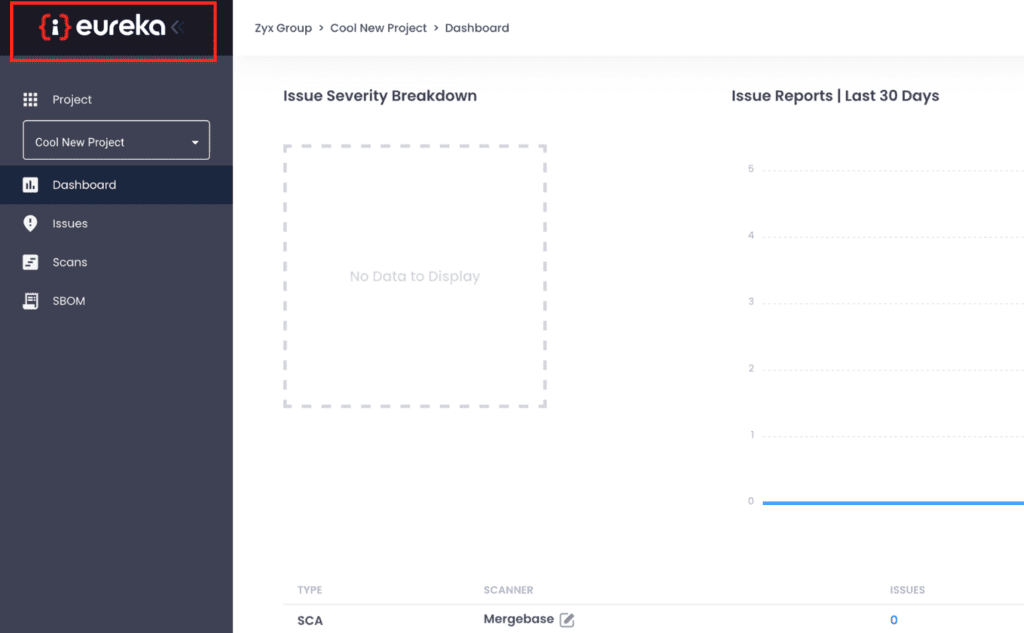
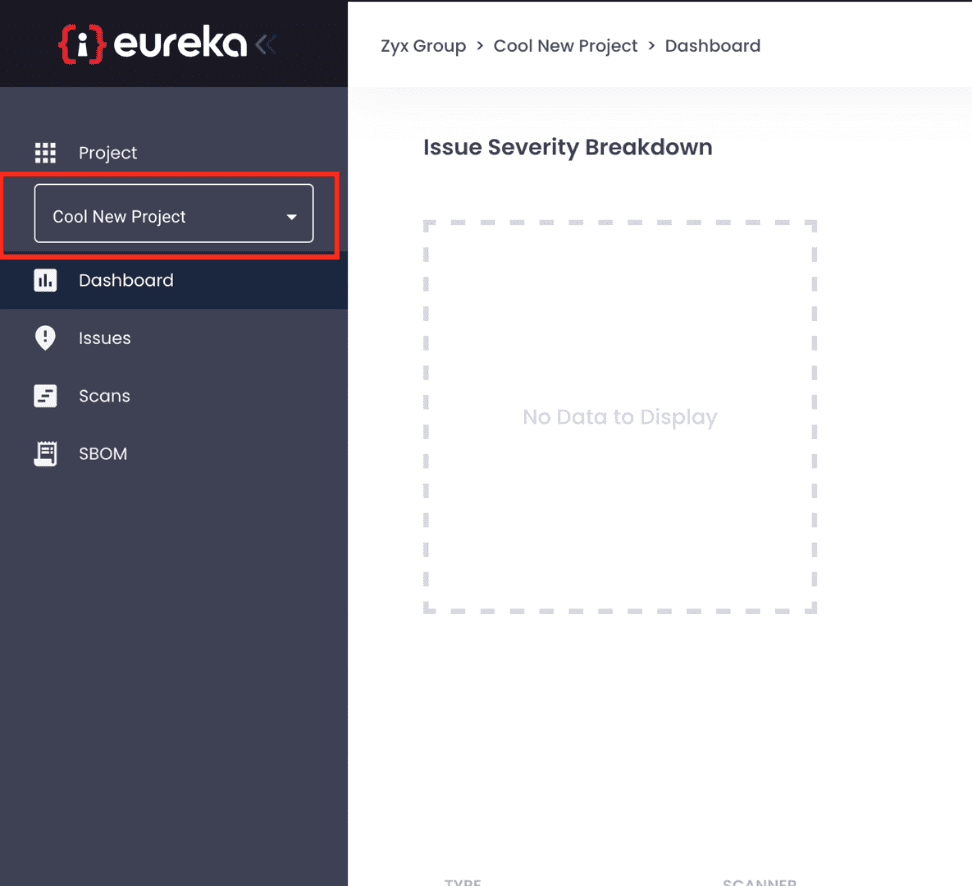
3. You can now use the Project Select dropdown to switch between your current view
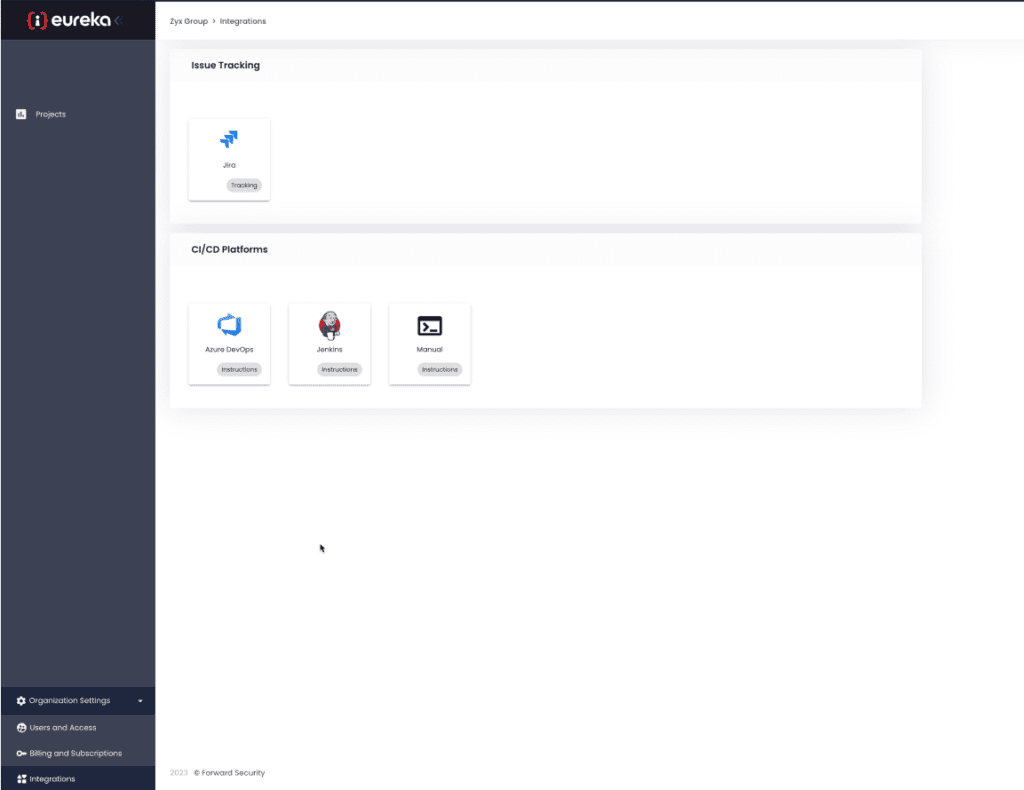
4. Next you can start your CI/CD setup steps click the Project Settings from the side navigation click the CI/CD Configuration option and select your build server and follow the instructions
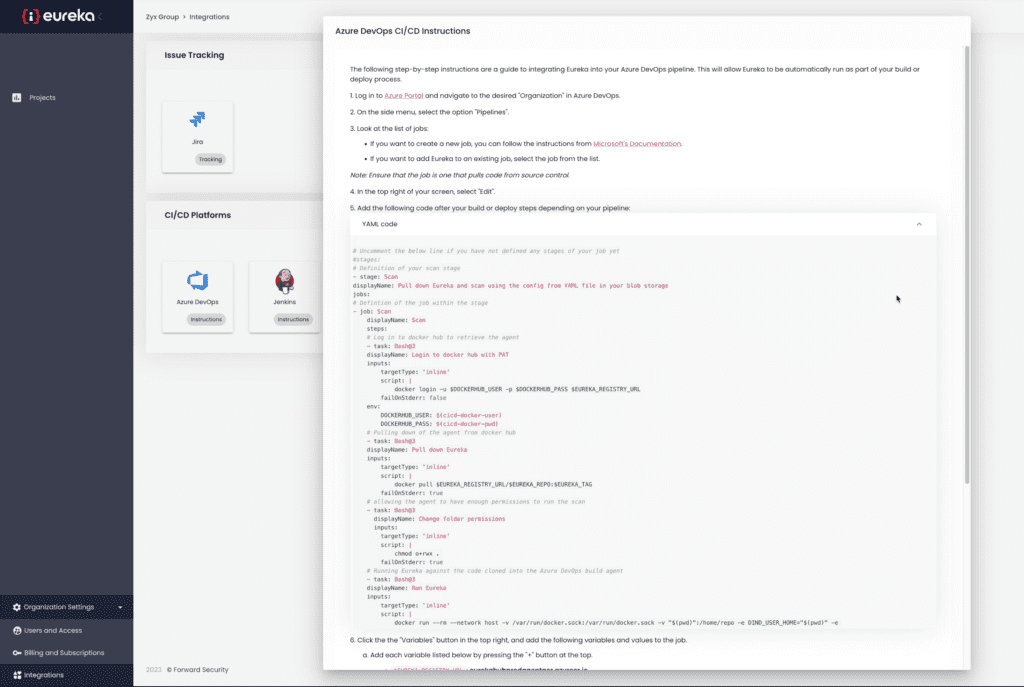
5. Once you’ve completed setting up your job you will need to Generate your docker login
6. Scroll down from your CI/CD instructions to the generate key instructions click Generate
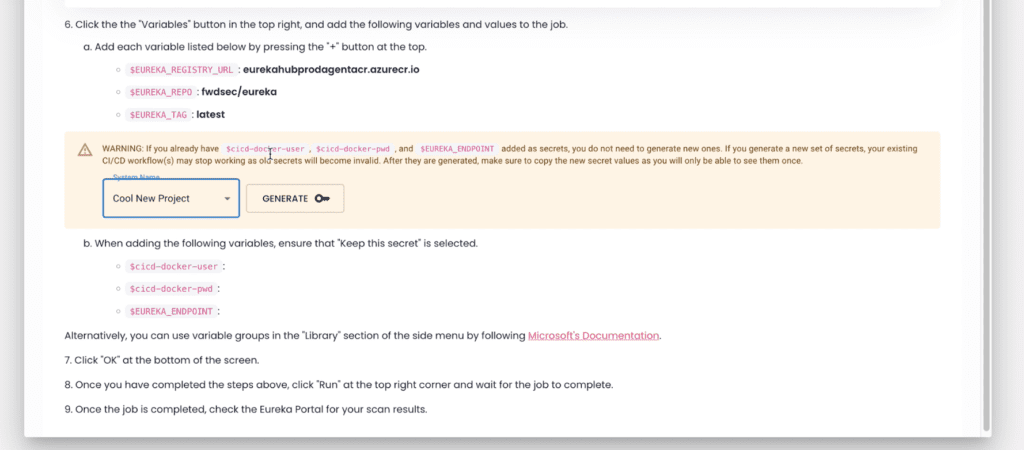
7. Copy your key to in a vault where your CI/CD job can get it you should save this value as EUREKA_ENDPOINT
8. Copy the Docker username and Docker password and save them within your vault as cicd-docker-user and cicd-docker-pwd
9. Go to your CI/CD job and run
10. Once the job is complete navigate back to your issues page and you’ll see some issues
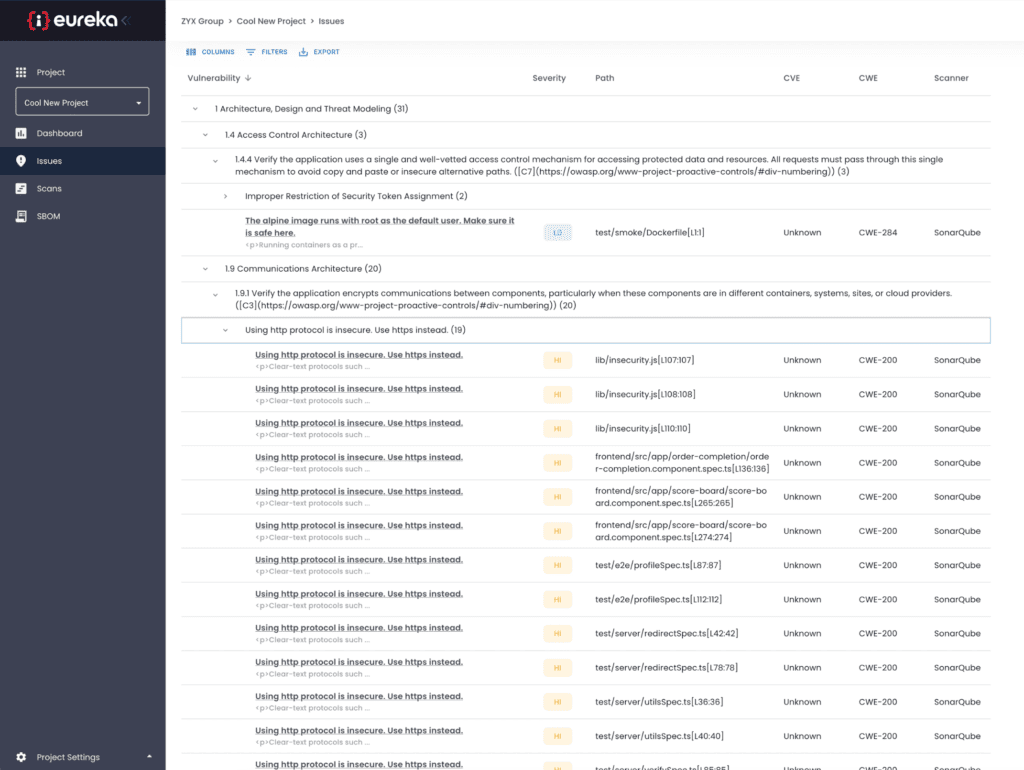
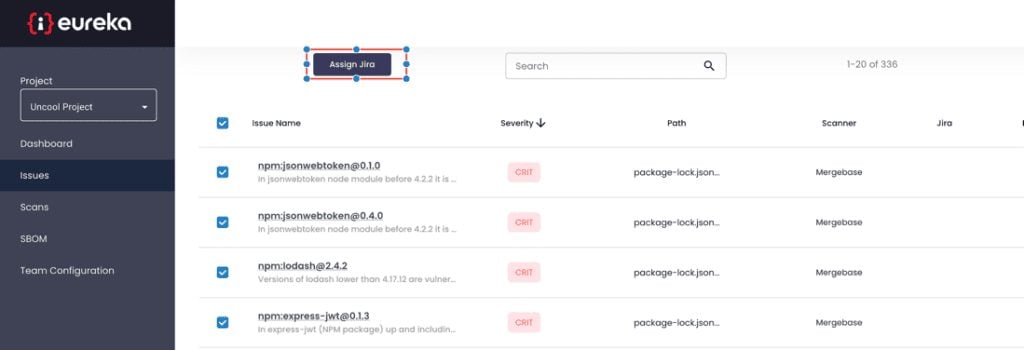
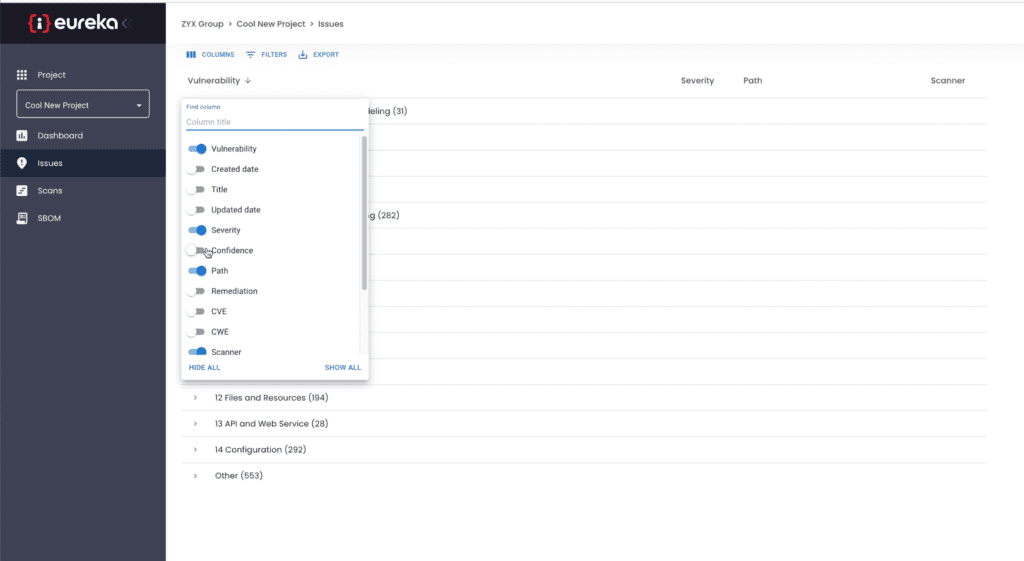
12. Set columns and filters.

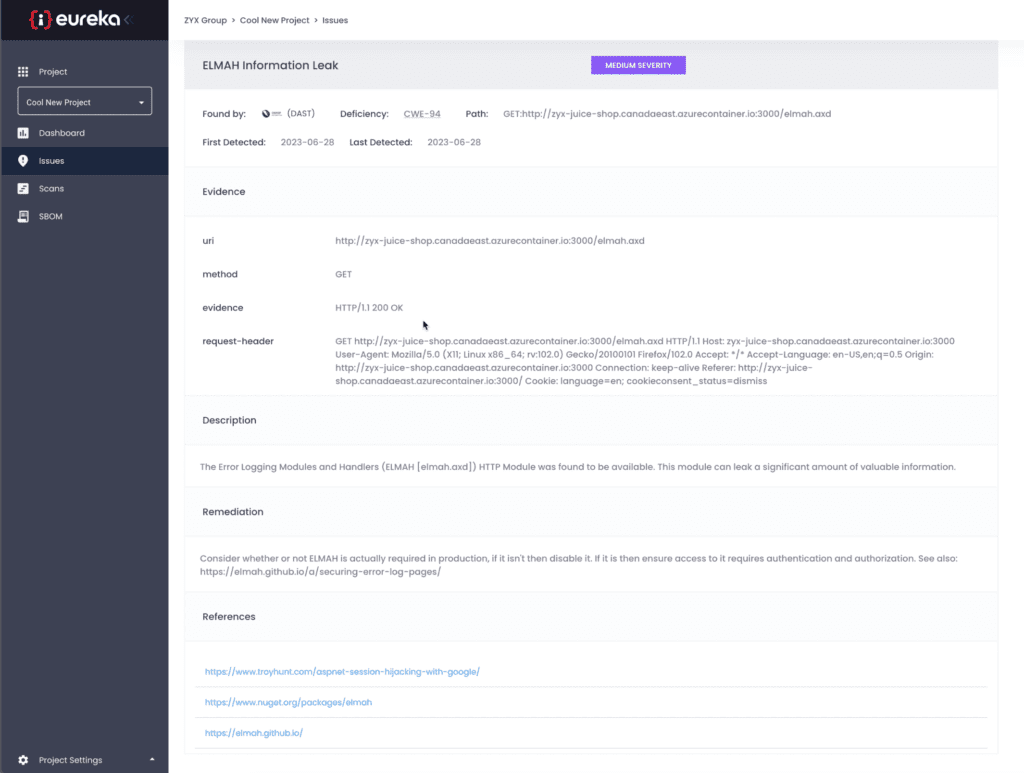
13. Click on a issue to see details
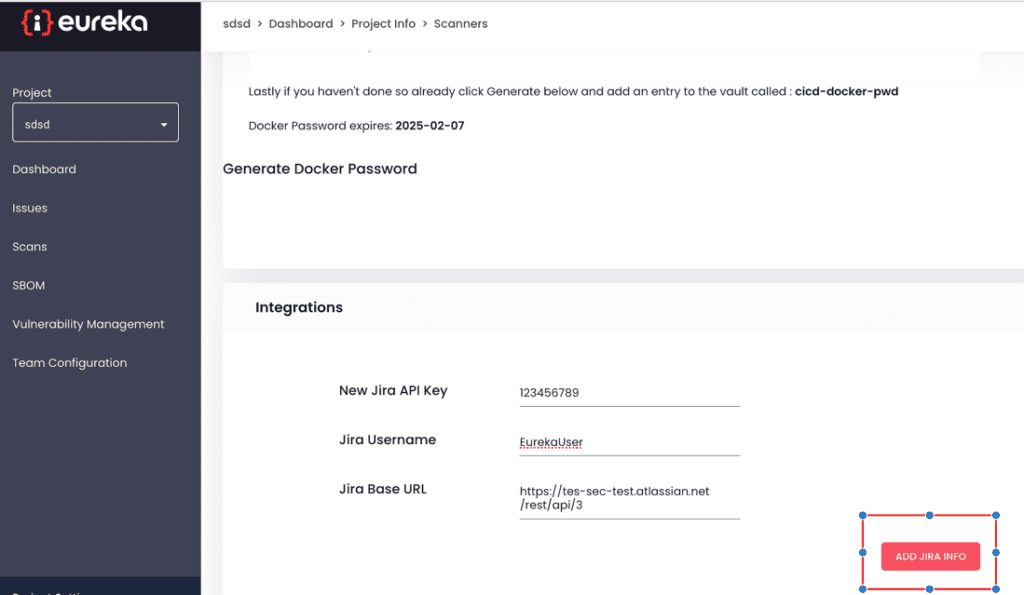
12. Optional last steps for Jira Integration
13. Fill in the fields as follows:
- JIRA API KEY (the API key for the user the Eureka application will use)
- Jira username (the email of the Jira user)
- Jira base URL (the link to your Jira instance REST API endpoint)
19. Once you’ve completed this click “Add Jira Info”
17. Now navigate back to your issues page and you can now assign issues to Jira